This weekend build came as an idea of a "photo booth" experience in the house, a way to take a quick picture with the baby or the cats and have it uploaded to a shared dropbox folder.
Hardware
- Raspberry Pi 3
- Raspberry Pi Camera module V1
- SB Components clear case
- USB Power suply
- 1 Red diffused LED
- 1 Push button
- 1 Tiny breadboard
- Velcro strips
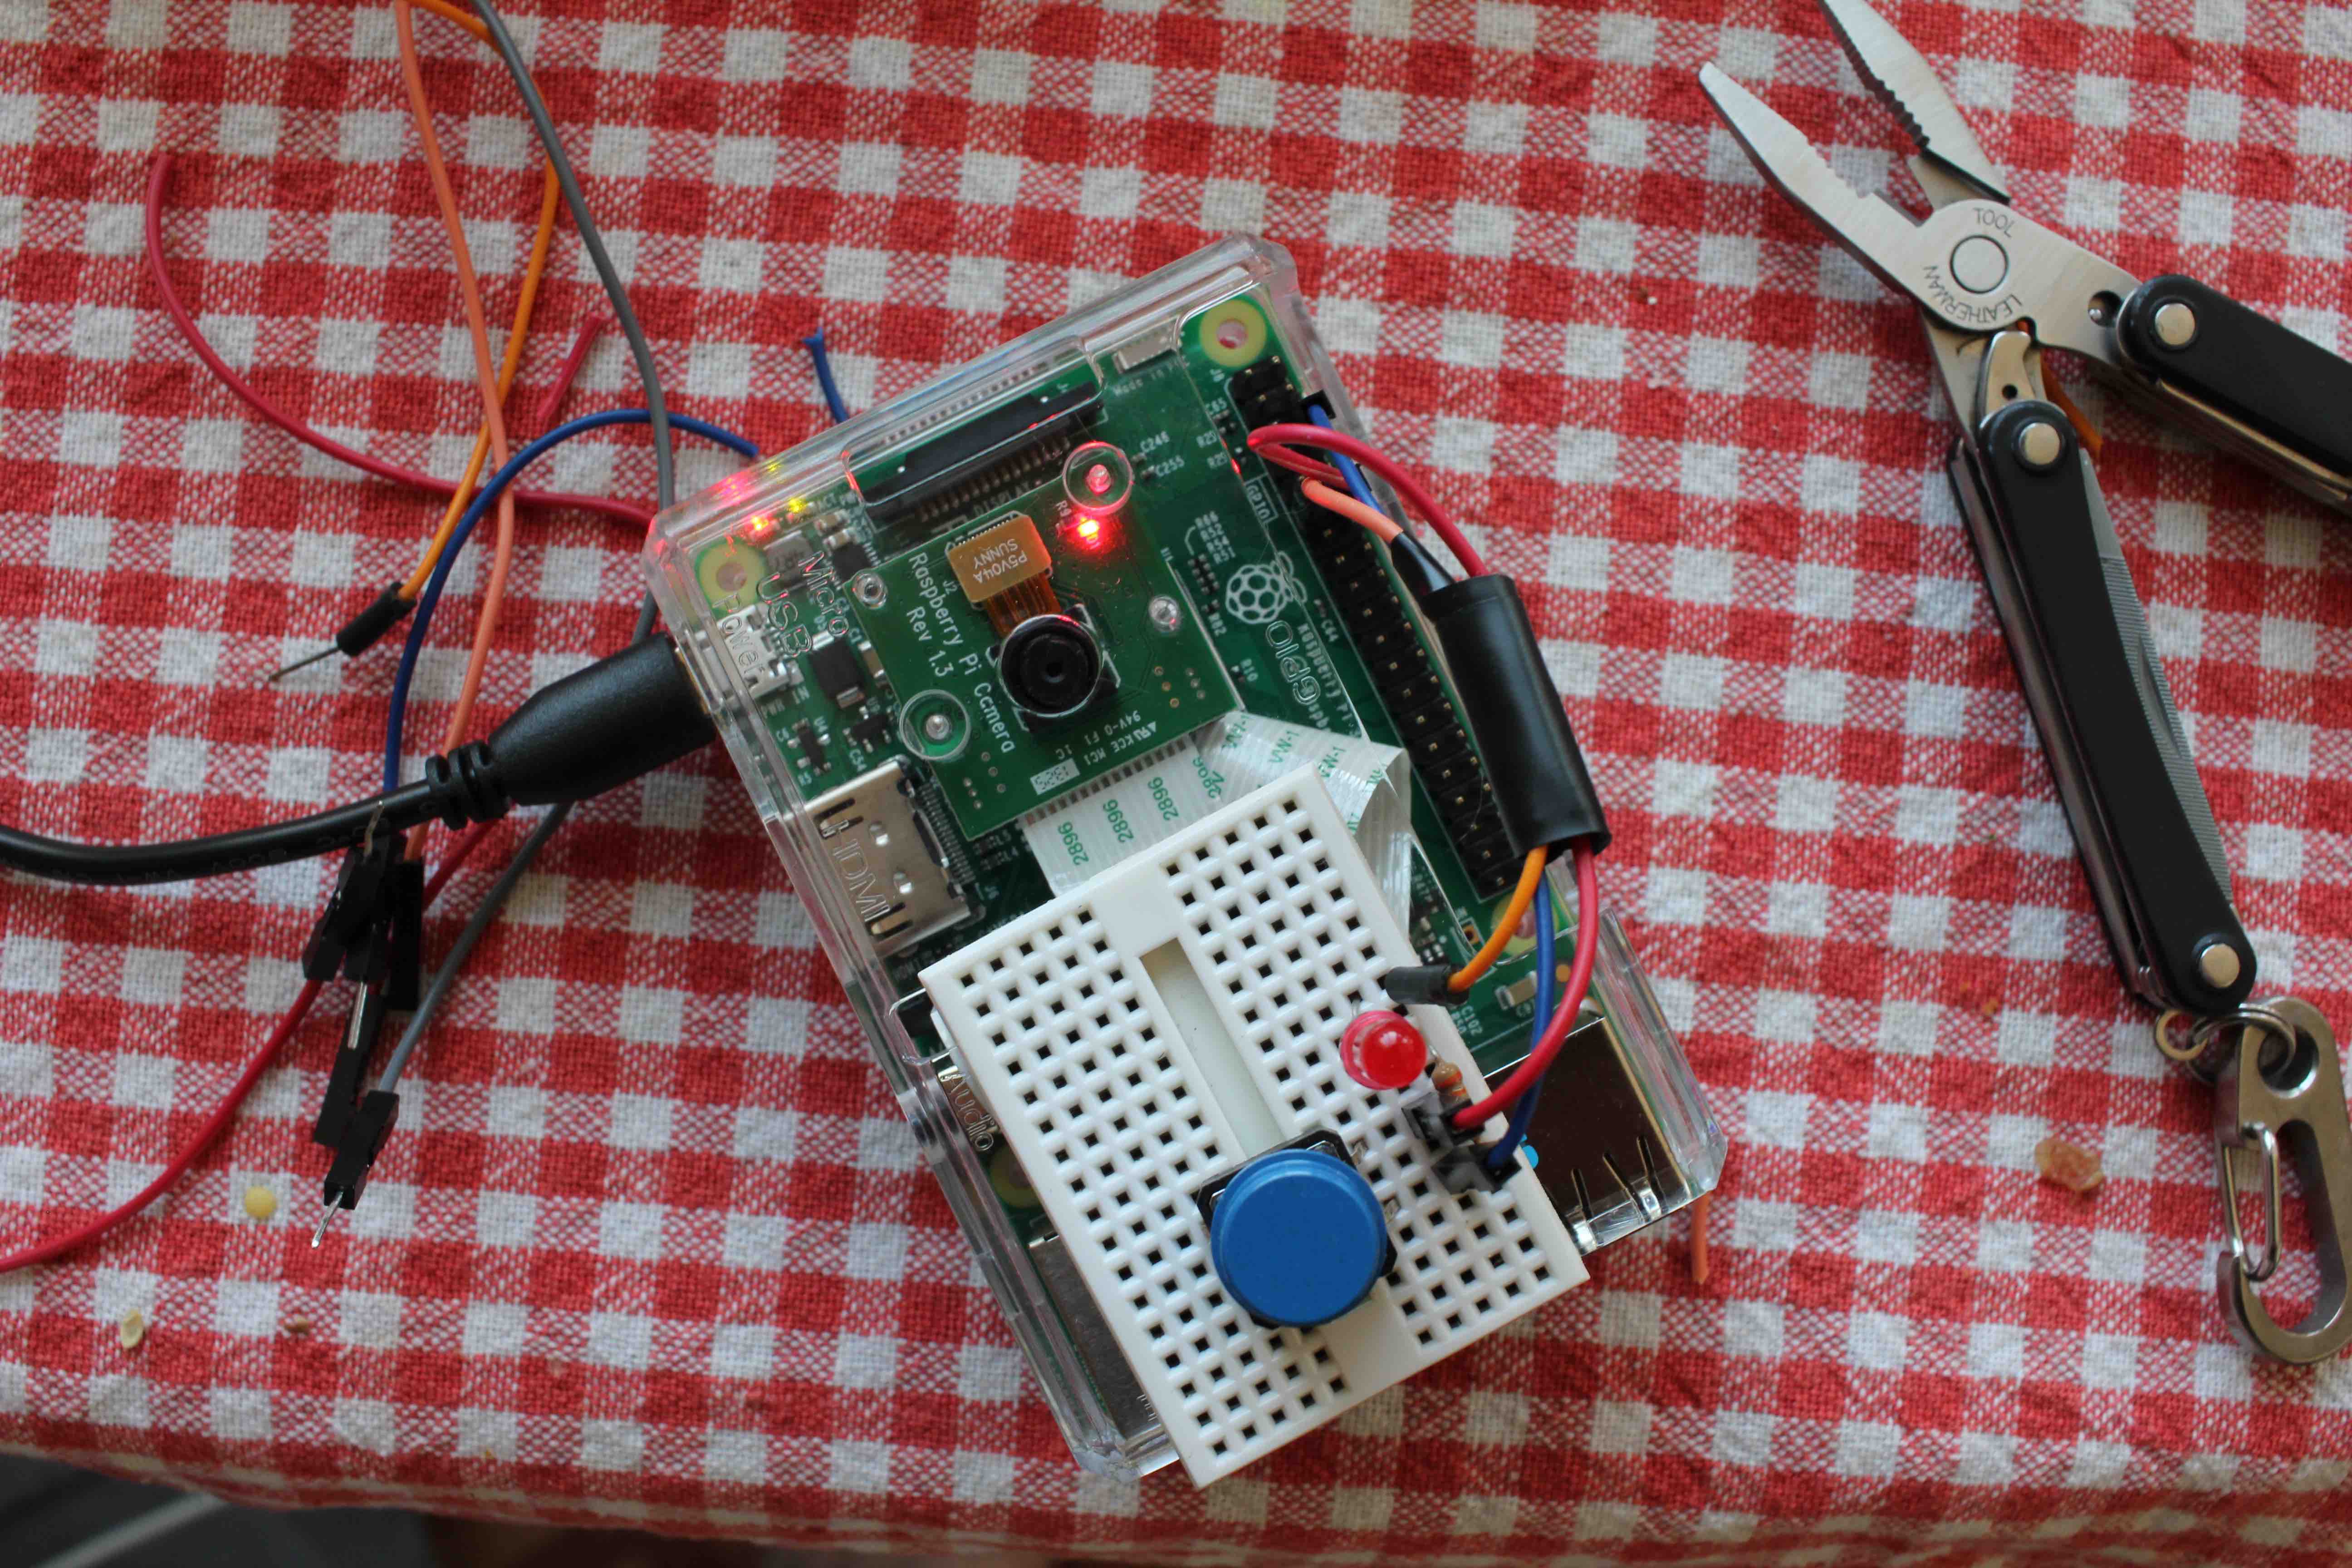
The Raspberry Pi 3 was a natural fit for this build as it has WiFi out of the box, GPIO support and the camera module is easy to set up. I could forward mount the camera with the SB Components case and I used velcro to attach the tiny breadboard to it.
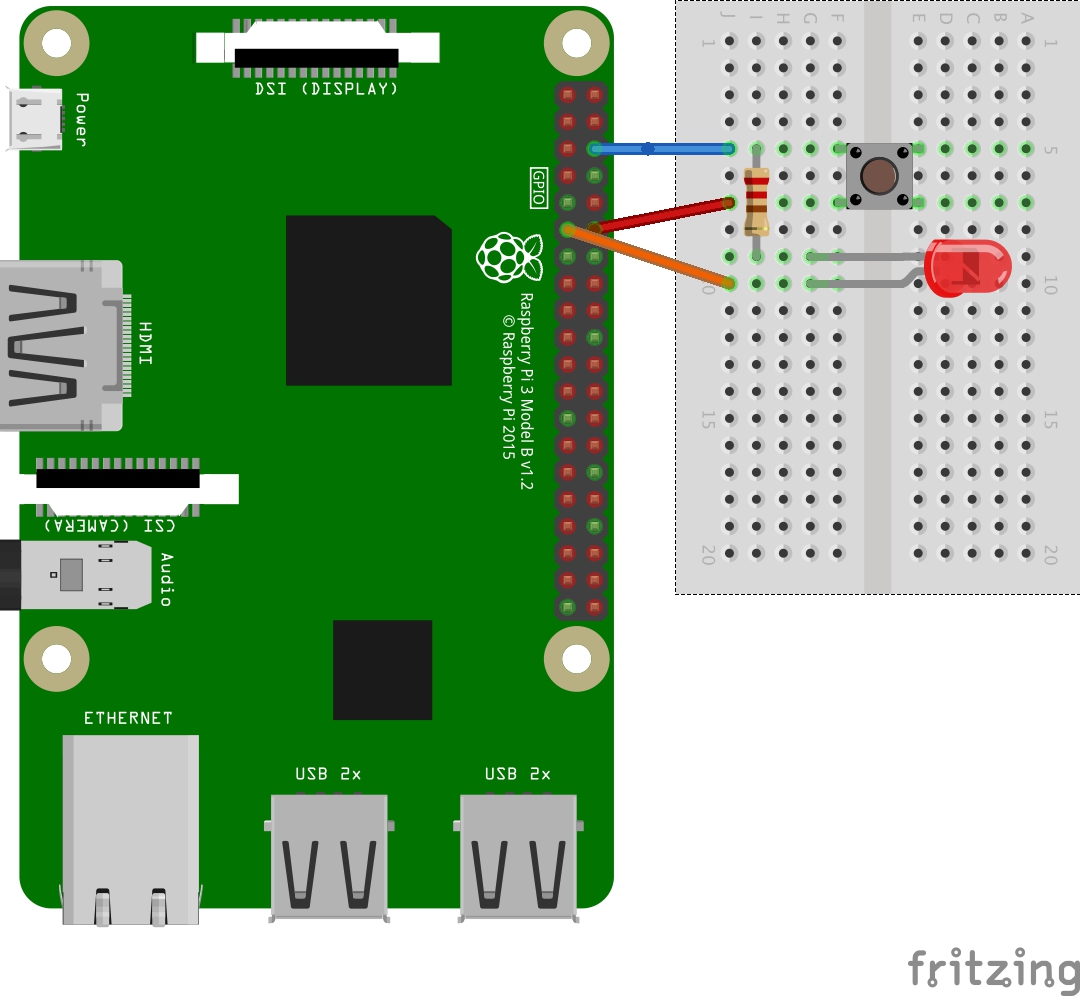
Push button wired to pin 18 and the led to pin 17, both wired to ground, the LED via a resistor.
Setup
Configured the camera module
Installed and configured Dropbox-Uploader.
Note about Dropbox-Uploader acess types:
I discovered that you cannot share app folders in dropbox, so I had to re-do my application access types to share the photos with my wife. You can still use an app folder then auto move the photos to a shared folder using something like wappwolf.
Software
The python program will use RPi.GPIO to listen for button presses and use the indicator led to signal a count down and take a picture using picamara. Uploading the image to dropbox is delegated to Dropbox-Uploader.
import time
import os
import RPi.GPIO as GPIO
from subprocess import call
from picamera import PiCamera

BUTTON_PIN = 18
LED_PIN = 17
HOME = '/home/pi'
IMG_FOLDER = "photo_booth"
REMOTE_FOLDER = "/Photos/photo-booth/"
UPLOADER_CMD = os.path.join(HOME, "Documents/Projects/Dropbox-Uploader/dropbox_uploader.sh upload")

GPIO.setmode(GPIO.BCM)
GPIO.setup(BUTTON_PIN, GPIO.IN, pull_up_down=GPIO.PUD_UP)
GPIO.setup(LED_PIN, GPIO.OUT)
camera = PiCamera()
camera.resolution = (1024, 768)
camera.image_effect = "none"

def make_timestamp():
	return time.strftime("%a%d%b%Y%H%M%S", time.gmtime())

def make_image_location(name):
	return os.path.join(HOME, IMG_FOLDER, name)

def updload_picture(img_name, img_path):
	upload = UPLOADER_CMD + " " + img_path + " " + REMOTE_FOLDER + img_name
	call([upload], shell=True)

def count_down(duration, intervals):
	while(intervals > 0):
		GPIO.output(LED_PIN, GPIO.HIGH)
		time.sleep(duration)
		GPIO.output(LED_PIN, GPIO.LOW)
		time.sleep(duration)
		intervals -=1

def take_picture():
	img_name = make_timestamp() + '.jpg'
	img_path = make_image_location(img_name)
	camera.capture(img_path)
	updload_picture(img_name, img_path)

while True:
	input_state = GPIO.input(BUTTON_PIN)
	if input_state == False:
		count_down(0.5, 3)
		take_picture()
		#indication that all is done
		count_down(0.2, 3)
	time.sleep(0.3)
Step by step setup found on the project page in Github
Auto start
To start the program on boot I modified /etc/rc.local to include the following lines
#Auto run the photo booth app
python /home/pi/Documents/Projects/pi-booth/pbooth.py
Tests
Wall mounted and ready to go, first 5 minutes we got a few pictures in and the LED indicator seems to catch the baby's attention, I was not blown away with the image quality on the camera module V1 but perhaps that could be mitigated with some of the picamara effects.
